With winter starting, there has never been a better time to engage in a DIY project that is not only fun for you but also benefits the birds, that is, a homemade bird feeder. Having feed out for birds makes a huge difference to the well-being of wild birds. Food is scarce in winter and the food that you put out in your garden could be the difference between surviving winter and starvation.
Making your own cookie cutter bird feeder is a simple project that doesn’t take more than 30 minutes, and if you have children, it’s a great way of keeping them engaged. It also helps bring out their inner creativity.
The best thing about this super simple activity is that it is inclusive for kids of all ages. You, therefore, don’t need to worry about excluding some of your children as they can partake in the activity as well.
What You’ll Need
· 10-gram packets of unflavored gelatin
· 2/3 cups of boiling water
· 2 cups of birdseed.
· Your preferred shaped cookie cutter
· A string
· Toothpicks
· Parchment paper
Make Your Own Cookie Cutter Bird Feeder
10 Steps To Building Your Own Bird Feeder
1. Once you’ve gathered all your ingredients, pour the boiled water into a bowl and mix the gelatin into warm water to activate it. Mix the gelatin in a small saucepan and bring it to a simmer. Once the mixture is dissolved, remove it from the heat and set it aside to cool for a few minutes.
2. After that, the cups of birdseed into a mixing bowl and slowly pour in the cooled gelatin mixture. Stir it until the birdseed is coated with the gelatin liquid. During this step, you can add more birdseed depending on what seeds make up your birdseed and how absorbent your blend is.
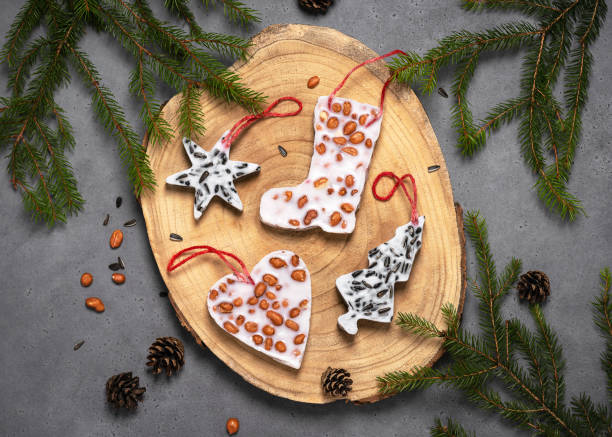
3. Layout your preferred cookie cutter shapes on a sheet of wax paper. If you have children, especially younger ones helping with this project, you can use fun, differently shaped cookie cutters to increase their excitement for the project.
4. Fill up the cookie cutters with the birdseed and gelatin mixture. Fill the mix halfway, ensuring it is packed snuggly to avoid air pockets. This ensures that the ribbon is at the center of the cookie and holds well when hanging it from a tree. A ribbon or string that isn’t placed at the center can result in the finished cookie breaking away easily.
5. Tie a knot at the end of the string to form a loop.
6. While holding the looped end of the string in the cookie-cutter, cover the ribbon with birdseed to ensure it holds in place. Continue filling up the rest of the container with the birdseed and gelatin mixture.
Bird Feeder Finalizations
Ensure it’s packed down as tightly as possible, paying particular attention to the corners if you have any odd-shaped cookie cutters. Star-shaped cookie cutters, especially, make it difficult to get the birdseed mixture in its corners, especially for children. Therefore, you need to help them do this so that they pack the tough-to-reach corners.
7. Next, leave the mixture on a counter for an hour to firm up and harden the gelatin.
8. Turn over the cookie cutters and press them down firmly. This helps level off the other side of the cutter and ensures the birdseed is more compact. It also enables you to get a firmer cookie at the end.
9. Leave the cookies in the cutters overnight to ensure they’ve dried up entirely and avoid running. Once the cookies have dried up, you will have an easier time getting them out of the cookie-cutter as they slide out on their own. However, a key thing to note is that the drying time will depend on your area’s humidity conditions, leaving them overnight gives the homemade bird feeder more time to harden.
10. Hang them on the trees for the birds to enjoy.
Need Extra Help?
Overall, making a homemade bird feeder is an activity that doesn’t require your kids to come into contact with any heat. It’s easy to do and is engaging for the young ones. Visit Mendham Garden Center for all of you winter bird seed needs!